
Transplanting ‘Merton’ cauliflower involves a process similar to transplanting other cauliflower varieties, with some attention to the specific needs of this variety. Here’s a guide to help you successfully transplant ‘Merton’ cauliflower:
1. Understanding ‘Merton’ Cauliflower
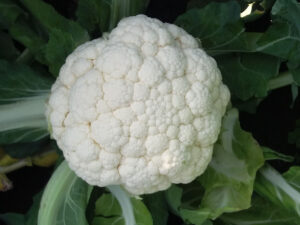
- ‘Merton’ is a specific variety of cauliflower known for its hardiness and good flavor.
- It’s suitable for various climates, but it typically thrives in cooler conditions.
2. Timing for Transplanting
- Choose a time when temperatures are cooler, as cauliflower prefers cooler weather. Early spring or late summer are typically good times, depending on your local climate.
3. Seedling Preparation
- Start with healthy ‘Merton’ cauliflower seedlings. They should be 4-6 weeks old with strong stems.
- Harden off the seedlings by gradually exposing them to outdoor conditions over a week.
4. Soil and Site Preparation
- Cauliflower grows best in well-drained, fertile soil with a pH of 6.0 to 7.0.
- Work compost or well-rotted manure into the soil to enrich it.
- Choose a site with full sun to partial shade.
5. Transplanting
- Space the plants about 18-24 inches (45-60 cm) apart.
- Dig a hole for each plant, place the seedling in, and fill the hole with soil. Firm the soil gently around the plant.
- Water the seedlings well after transplanting.
6. Watering and Care
- Keep the soil consistently moist. Water regularly, especially during dry spells.
- Mulch around the plants to retain moisture and suppress weeds.
7. Feeding
- Apply a balanced fertilizer a few weeks after transplanting to promote growth.
- Avoid over-fertilizing, which can lead to leafy growth at the expense of the cauliflower head.
8. Pest and Disease Management
- Watch for common pests like aphids, caterpillars, and slugs.
- Rotate crops each year to prevent soil-borne diseases.
9. Blanching (If Desired)
- For a whiter head, tie the leaves over the head to protect it from sunlight, a process known as blanching.
10. Harvesting
- Harvest when the heads are firm and tight, cutting the stem beneath the head.
- Don’t wait too long to harvest, as the heads can become loose and lose quality.
11. Aftercare
- After harvesting the main head, you may get smaller side shoots that are also edible.
Remember, local climate and soil conditions can significantly affect the growth of ‘Merton’ cauliflower, so it’s helpful to adapt these guidelines to your specific environment. Additionally, seeking advice from local gardening experts or nurseries can provide valuable insights tailored to your area.

Reviews
There are no reviews yet.